How to Compress Images for WordPress: Speed Up Your Site in 2026
imagepixa Team
Image Processing Specialists
Images are the heaviest assets on most WordPress sites, often accounting for over 50% of total page weight. Unoptimized images slow your site, hurt your Core Web Vitals, and cost you search rankings. The good news? Compressing images for WordPress is straightforward — and the performance gains are immediate.
Why Image Compression Matters for WordPress
Google uses page speed as a ranking factor, and images are usually the biggest bottleneck. Here's what unoptimized images cost you:
- Slower Largest Contentful Paint (LCP): If your hero image takes 4 seconds to load, your LCP score tanks — and so does your ranking.
- Higher bounce rates: 53% of mobile users abandon a site that takes more than 3 seconds to load.
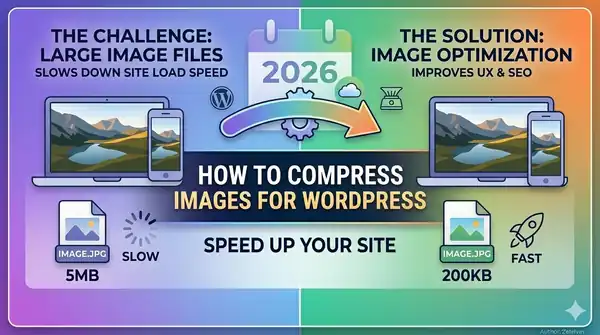
- Wasted bandwidth: A 5 MB hero image that could be 200 KB is costing you (and your visitors) real money on metered connections.
- Poor mobile experience: Mobile devices on slower networks suffer the most from oversized images.
What WordPress Does by Default
WordPress automatically generates multiple sizes of every image you upload (thumbnail, medium, large, full). However, it does not meaningfully compress them. The default compression quality is set high (~82% for JPG), which preserves quality but doesn't reduce file size enough.
This means a 4 MB photo from your camera gets duplicated into several sizes, but each one is still unnecessarily large. You need to take compression into your own hands.
Method 1: Compress Images Before Uploading
The most reliable approach is to optimize images before they ever touch WordPress. This gives you full control over quality and file size.
Step 1: Resize to the Right Dimensions
There's no reason to upload a 4000×3000 px photo when your WordPress theme displays it at 1200 px wide. Use the ImagePixa Image Resizer to resize images to your theme's content width before uploading.
Common WordPress image dimensions:
- Blog featured image: 1200×630 px
- Full-width hero: 1920×1080 px
- Content images: 800–1200 px wide
- Thumbnails: 300×300 px or 400×400 px
Step 2: Compress for Quality
After resizing, compress the image to reduce file size further. For most web photos, a JPG quality of 70–80% is visually indistinguishable from 100% but can cut file size by 60–80%.
Read our detailed guide to image compression for a deeper dive into lossy vs. lossless techniques.
Step 3: Crop to Fit
If your image has unnecessary whitespace or needs a specific aspect ratio, use the Crop Tool to trim it before uploading.
Method 2: Use WebP Format in WordPress
Since WordPress 5.8, WebP images are fully supported as an upload format. WebP files are 25–34% smaller than JPG at the same quality, making it the ideal format for WordPress sites.
How to Use WebP in WordPress
- Upload directly: WordPress 5.8+ accepts WebP uploads natively. Simply convert your images to WebP before uploading.
- Server-side conversion: Many hosting providers (Cloudflare, SiteGround, Kinsta) offer automatic WebP conversion at the CDN level — zero effort required.
- Theme support: Most modern WordPress themes handle WebP images correctly. Test with your theme to confirm.
WordPress Image Optimization Best Practices
Beyond compression, these practices ensure your WordPress images are fully optimized:
Enable Lazy Loading
WordPress adds loading="lazy" to images by default since version 5.5. This means images below the fold don't load until the user scrolls to them, saving initial page weight. Make sure your theme doesn't override this behavior.
Use Responsive Images
WordPress automatically generates srcset attributes for images, serving smaller sizes to smaller screens. To take advantage of this, always upload images at least as wide as your theme's largest display size.
Write Descriptive Alt Text
Always fill in the alt text field when uploading images. This helps with SEO (Google reads alt text to understand images) and accessibility for screen reader users. Be descriptive and natural — don't stuff keywords.
Use Clean File Names
Rename files before uploading. blue-running-shoes-nike.jpg is far better for SEO than IMG_20260321_143522.jpg. Use hyphens to separate words, keep it lowercase, and be descriptive.
Target File Sizes
As a general rule of thumb:
- Hero/banner images: Under 200 KB
- Blog content images: Under 100 KB
- Thumbnails: Under 30 KB
- Total page image weight: Under 1 MB ideally
Conclusion
Compressing images for WordPress doesn't need to be complicated. The most effective approach is simple: resize, compress, and crop your images before uploading using tools like ImagePixa's Image Resizer. Pair that with the WebP format and WordPress's built-in lazy loading, and your site will load significantly faster.
Faster loading means better Core Web Vitals, higher search rankings, and happier visitors. Start optimizing your images today — the results are immediate and measurable.
Ready to optimize your images?
Resize your photos to the perfect dimensions instantly.